
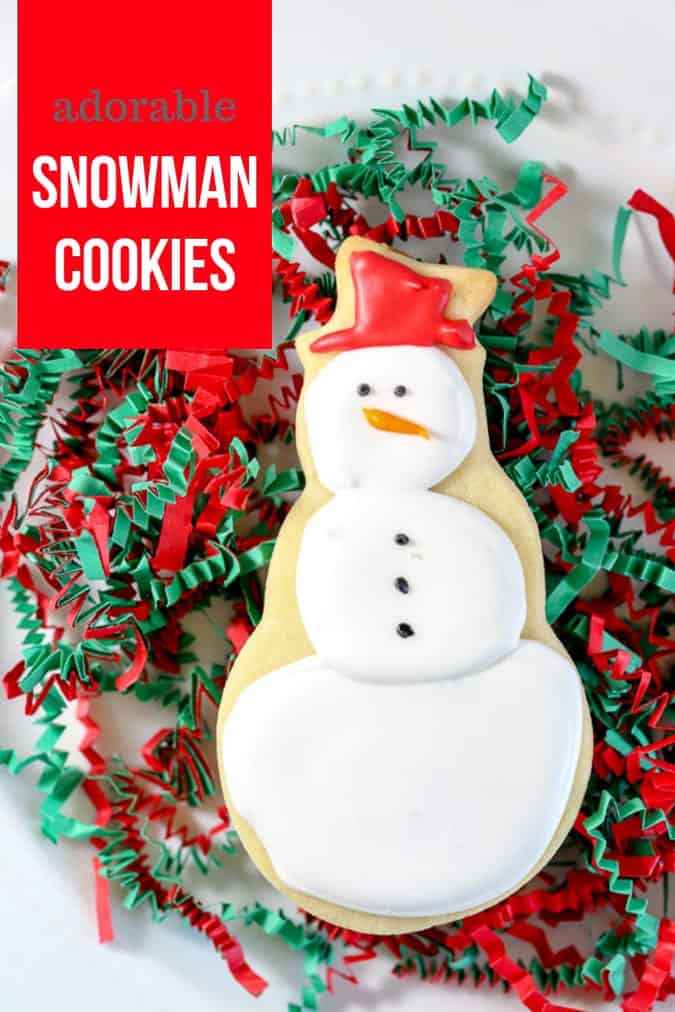

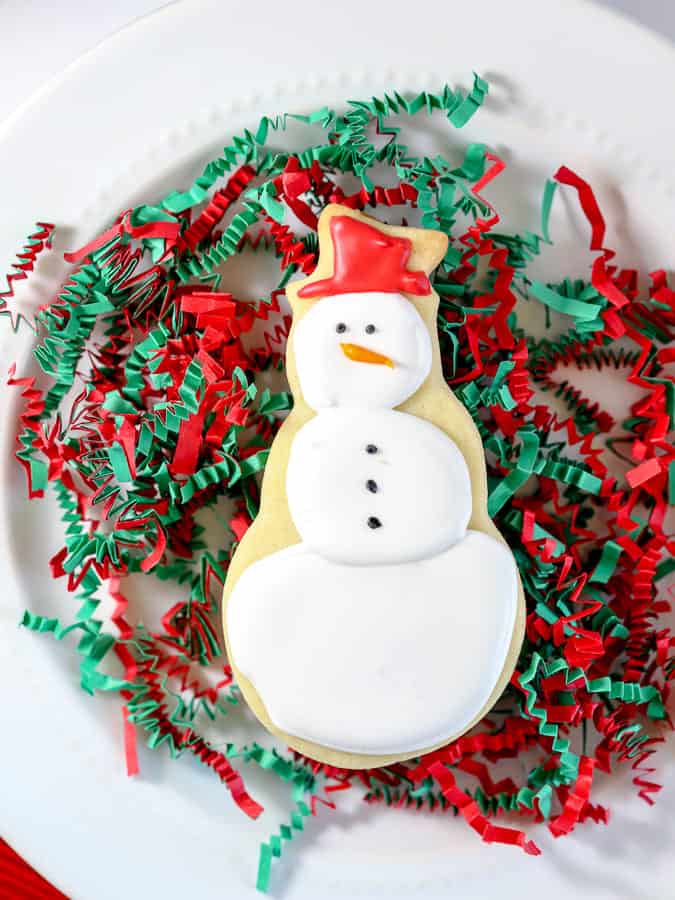
Decorating sugar cookies is fun for the whole family. Let me show you how simple it is to make these adorable snowmen cookies with royal icing at home. You’ve probably seen the snowman cookies at Starbucks. They are cute. But why buy them when you can make these easy snowman cookies?

Baking Christmas cookies is a tradition that spans generations. Children through great grandparents can all get involved. Decorating with royal icing isn’t hard, but it does take some practice.
Being well prepared with bottles of icing ready to go makes a family session of cookie decorating a lot more fun. And try not to mind the mess when icing cookies with kids. A plastic tablecloth makes an ideal drop cloth. Just wipe it off and shake it outside when you are finished (the tablecloth, not the kids!).
Steps to Make Snowman Cookies:
- Bake a few dozen cut out cookies in the shape of snowmen.
- Make white royal icing.
- Cover the cookies with three circles of white royal icing.
- Add details with other colors for the hat, eyes, nose and buttons.
Let’s go through each step for decorating cookies with royal icing:
Begin with a chilled sugar cookie dough and roll out the dough. These snowman cookie cutters would be perfect! If you’d like a simple design that doesn’t include the hat (one less color to create later on), try this basic snowman cookie cutter.
You might find a design you like in a box of Christmas cookie cutters like this one.
Let your baked cookies cool completely before moving on to decorating.
As an Amazon Associate I earn from qualifying purchases.
Next, make your royal icing.
Meringue powder is key to great royal icing. Follow the directions on the side of this Wilton Meringue Powder for great results.
For white cookies like these snowmen, I leave out any flavors like vanilla extract or lemon juice that might tint the icing.
If you do enjoy adding extracts to your icing, try to bring back the bright white shade with a white icing coloring.
You’ll need two consistencies of icing– one for the outline and one for filling in the shapes. The outline icing is stiffer and will create a barrier so that your filling (or flood) icing won’t run off your cookie.
The only difference between the two consistencies is a small bit of water. Once you reach the outline consistency, set about 1/3 of it aside. You can put it in a piping bag or in a squeeze bottle.
Now work on the remaining icing to make the flood icing. Add only 1/4 teaspoon of water at a time, stirring well in between each addition.
You won’t need much water at all. The eyeball test to see if your icing is ready is to scoop a bit out then let it drizzle down into the bowl. Count slowly and see if your icing will disappear back into the bowl (rather than keeping its shape and staying on top) in two to three seconds.
Put this flood icing in a squeeze bottle or piping bag. I like to use one shape of squeeze bottle fitted with a smaller icing tip for the outline icing and another size bottle with a larger tip for the flood icing.
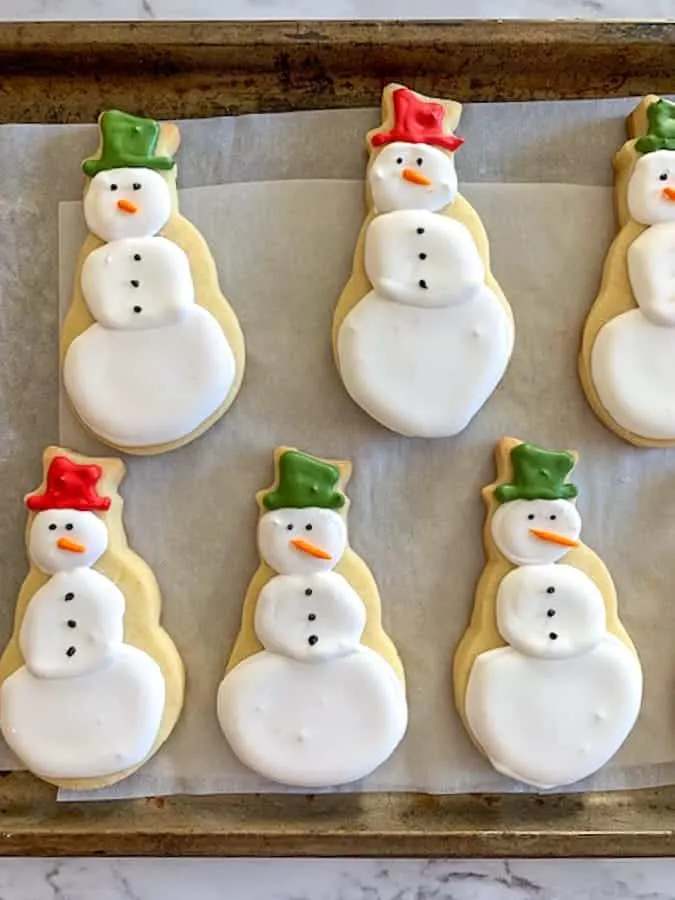
Create the shape of a snowman
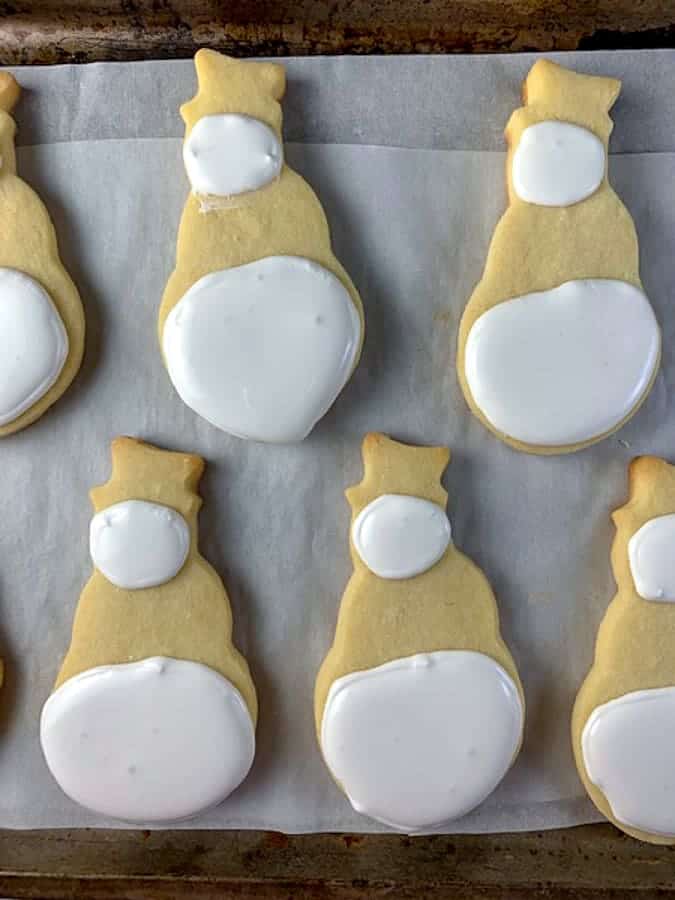
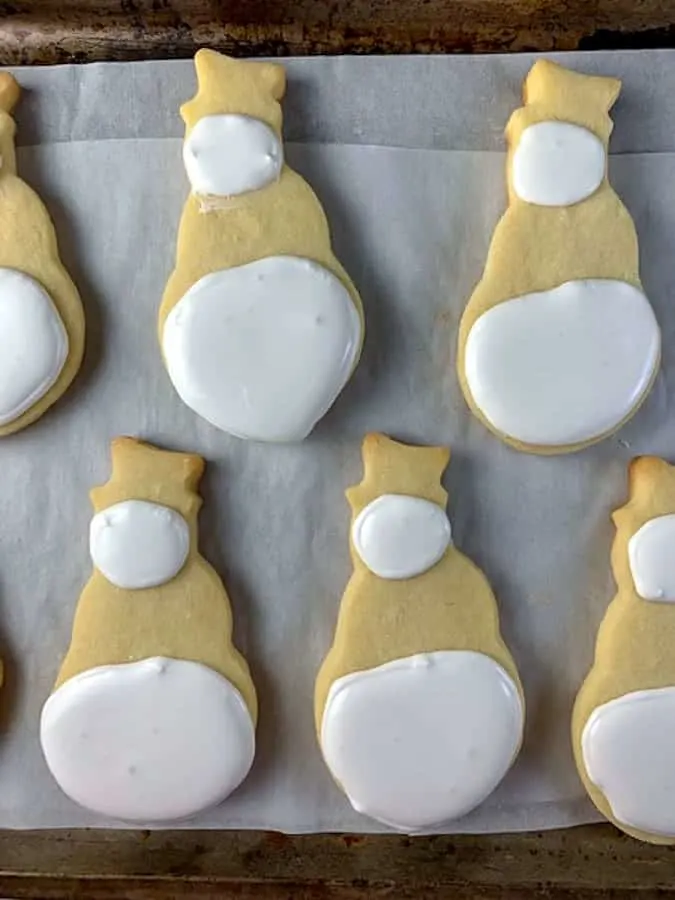
Now we’re ready to make the three circles of the snowman. Don’t get too caught up in perfection here. Snowman are made of snow and are never perfectly circular so give yourself a break with your cookie decorations!
To separate the three circles, start with only two: the head and the base of the snowman. Draw the outline of these two circles with the white royal icing then fill them in with the white flood icing.
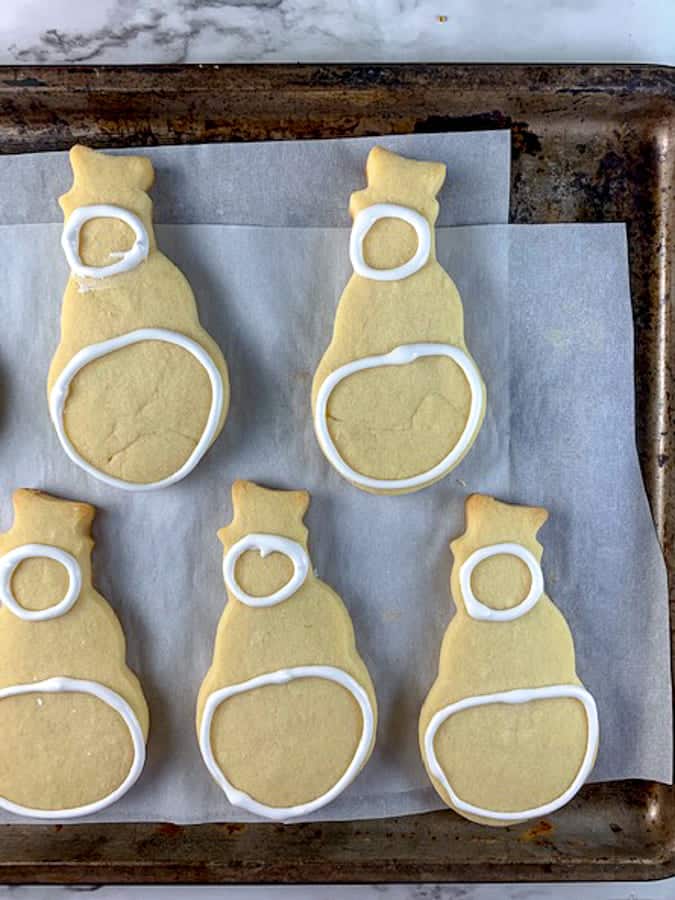
Let these two circles dry for 10 to 15 minutes.
Now go back and make the middle circle. Again outline with the stiffer icing and fill with the runnier icing.

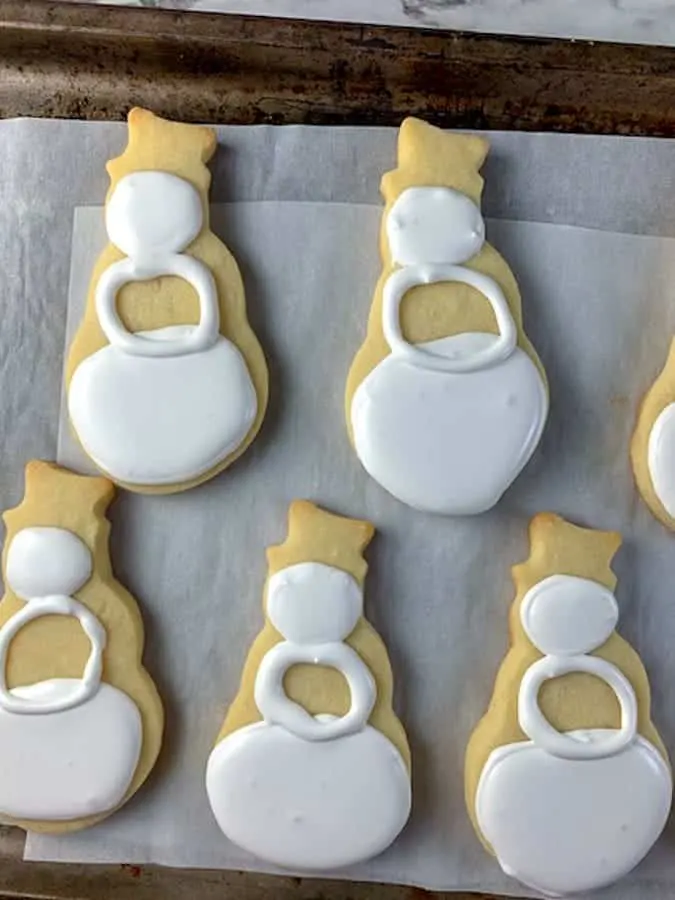
Let this dry completely.
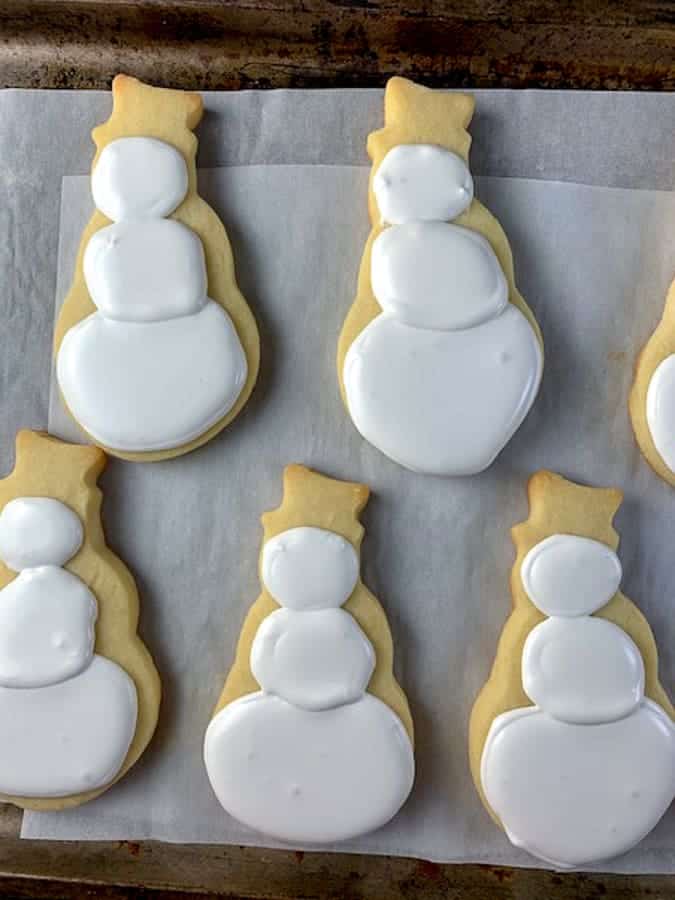
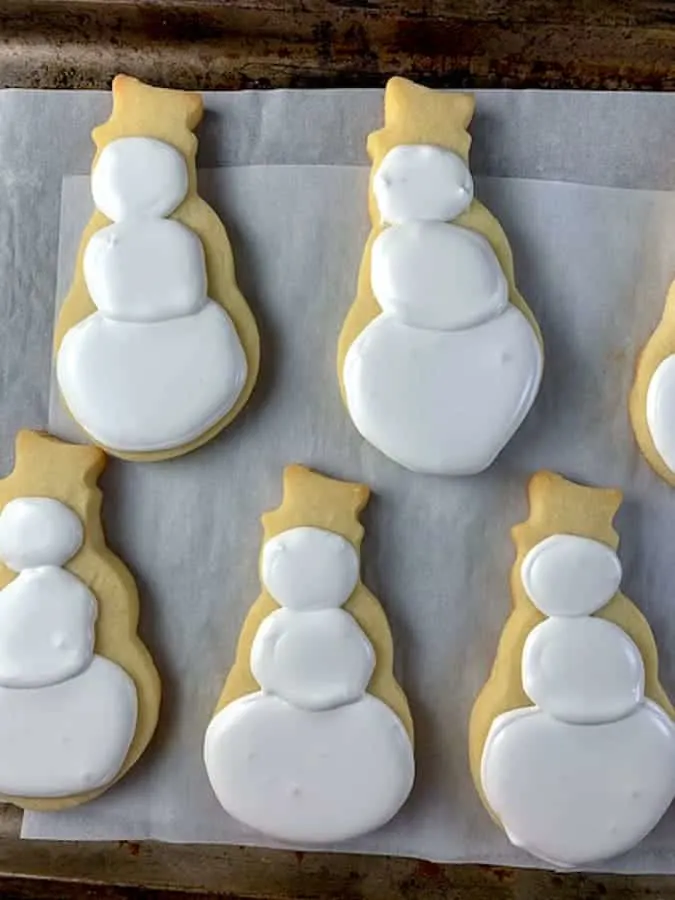
This added step of making two circles separately from the third allows each part to stand on its own. If you simply covered the whole cookie in white you would lose that detail.
Another option is to flood the whole cookie in white and then go back with the outline icing and pipe over top of the base layer to define the three segments of the snowman. See what works best for you!
Add colorful detail to your cookie
Does your snowman have a hat? Great! Use any color icing you’d like: black, red, green, blue, the choice is yours.
Make a small bit of colored royal icing or use store bought icings to make this step easier.
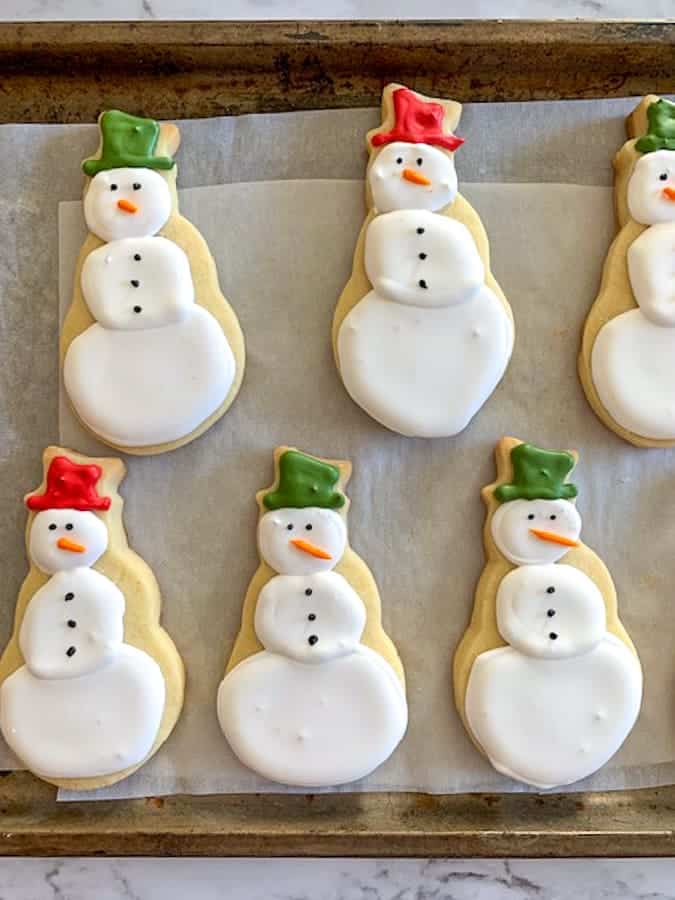
For my snowman hats, I piped red and green royal icing, first outlining then filling in with flood icing. The orange nose is also colored royal icing, although a tube of decorating icing from the store works well too.
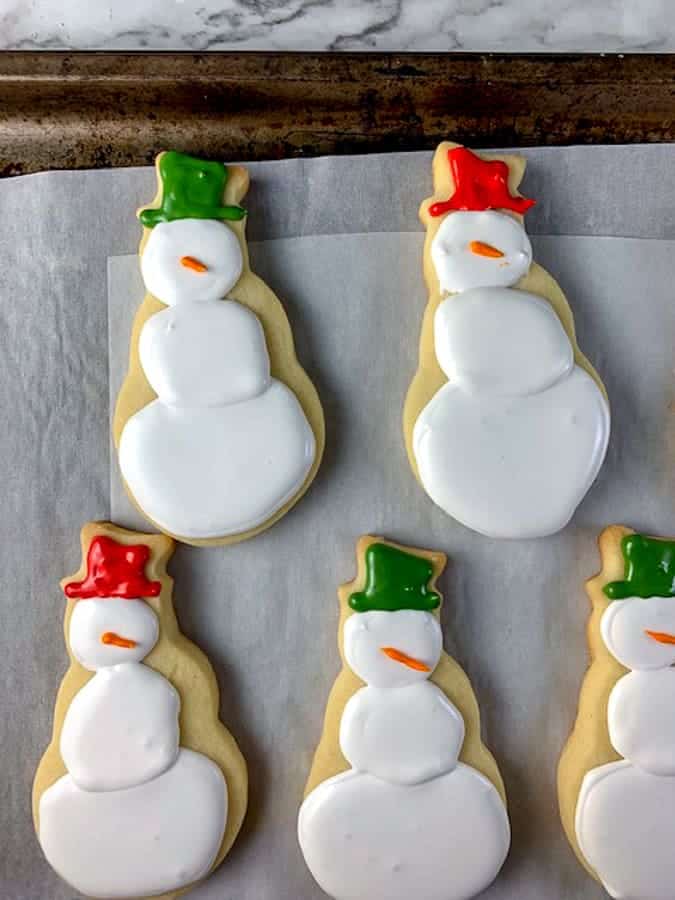
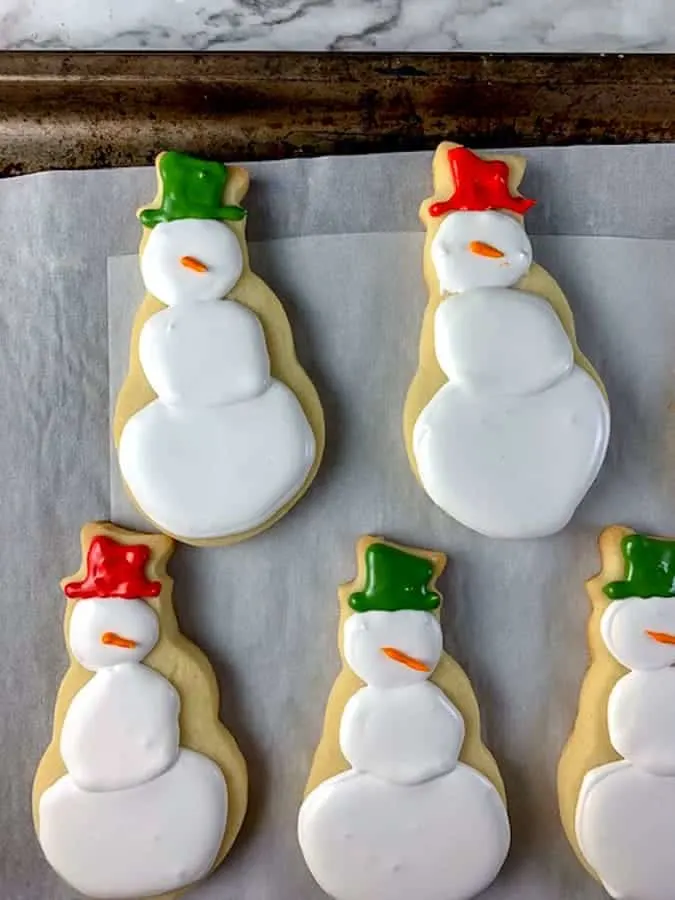
The eyes and the buttons on the snowmen were created quickly using this tube of black icing that I bought at the grocery store in the baking aisle. It comes in a lot of colors online.


What else could I add to my snowman cookies?
- white sparking sugar
- a cute scarf made with icing
- little stick-like arms made with icing or pretzels
- sprinkles! Because who doesn’t love sprinkles?
Can you make snowman cookies without royal icing?
Sure! Royal icing is a great way to decorate cookies but if you’re looking for more ideas to round out your snowman cookie baking, try these:
- Easy Snowmen Sandwich Cookies by Rachel Cooks
- Melted Snowman Chocolate Bark by Princess Pinky Girl
- Snowman Oreo Cookie Pops by Spend with Pennies
Are you looking for more cookies to add to your Christmas baking?
Here are more of my favorite holiday cookies:
- Pistachio Cranberry Rugelach
- Jam Thumbprint Cookies
- Chocolate Caramel Thumbprint Cookies
- 12 Cookies to Bake this Christmas Season
- New Year’s Eve Cookies
What kitchen items do I need to bake cookies?
We are a participant in the Amazon Services LLC Associates Program, an affiliate advertising program designed to provide a means for us to earn fees by linking to Amazon.com and affiliated


Holly Baker started the food blog, A Baker’s House, in 2011. She is the writer, recipe creator, and photographer for the site. Holly loves to bake and shares recipes for gluten free food, canning recipes, as well as traditional desserts too. Her recipes and food photography have been highlighted by BuzzFeed, Reader’s Digest, and She Knows.